Hello everyone, we’re back with another blog! Today we are going to show you, how you can install Windows 11 on any pc. With this method, whether your PC supports Windows 11 or not doesn’t matter.
Table of Contents
Windows 11 for any PC
Precautions
Back up all the important and necessary data you have stored on the PC. You should note that to properly install and use Windows 11, your PC should meet the minimum requirements:
- RAM: 4GB or more
- Processor: 1.5GHz or more
- Storage: 40GB or more
- 64bit compatible PC, 32bit not supported
Also, we would prefer an SSD for better speeds while booting and opening applications, etc. Although, you can Subscribe to Sarcastic Sindhi to double up your speeds????.
Don’t worry about the TPM and Processor support, this method will work for all PCs. Now without any further due, let’s get started!
NOTE: ALL THE LINKS ARE AT THE END OF THIS ARTICLE.
Make Bootable drive for Windows 11
First of all download the Windows 11 ISO from Microsoft’s official site (Link given below). Now download the latest version of the software used for making a bootable USB drive called RUFUS (Link given below).
When the downloading is complete connect your USB drive to your PC and open the RUFUS. Make sure to take a backup of all the items on your USB drive as this process will format it.
Now on the top of the RUFUS window, you will find a box to select your Drive. Here select the USB drive on which you want to boot Windows 11.

After selecting, in the boot selection click on select and browse through where you saved the Windows 11 ISO.

Here’s the most important step of the Windows 11 Installation. You will see a section called “Image Option”, in the latest version of RUFUS you will find this option as shown in the image below. Select the same option as shown in the image below.

Another important step is to choose a partition scheme. To check which partition scheme is suitable for your PC, right-click on This PC and click on manage. There you will see Disk Management. In Disk Management, right-click on your Primary Drive and go to Properties. Here you will see a section “Volumes”. In this, you will find Partition Style (MBR/GPT). So select the same option as you saw there.

Now make sure that you have opted for the right options in the red highlighted boxes as shown in the below image.

After all that hit start. When the process gets complete you will see a green bar saying “Ready”. So now your Bootable USB drive is ready.
If you know that how to Install Windows from a bootable drive then you’re all set, you can leave the blog now. But for those who didn’t know how to install Windows from a bootable drive, then you have to follow the process given below.
Windows Installation
Connect your bootable pen drive to your PC. Make sure to connect it directly to the USB port, which means no dongle or adapter.
Now press the power button and simultaneously press the Boot Override key for your PC’s motherboard. The key varies for each motherboard manufacturer so you can follow the chart.
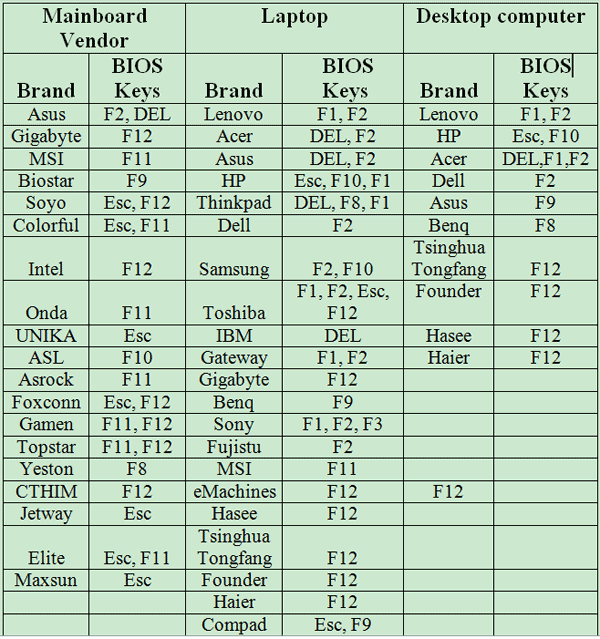
Once you see the boot options select the bootable drive of Windows 11. And it might ask you to “press any key to continue setup from USB”.
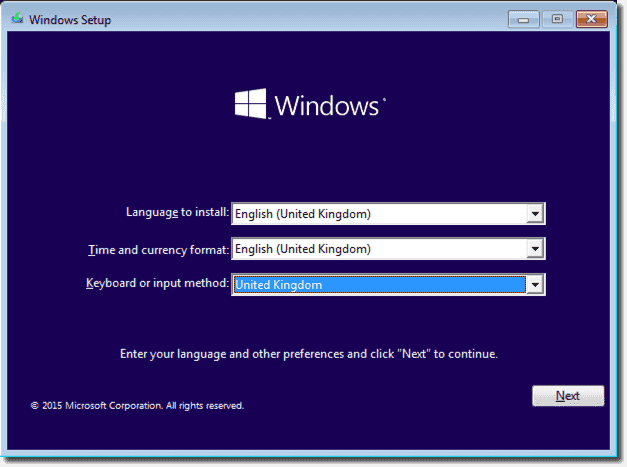
Now select your language and region and click Next.
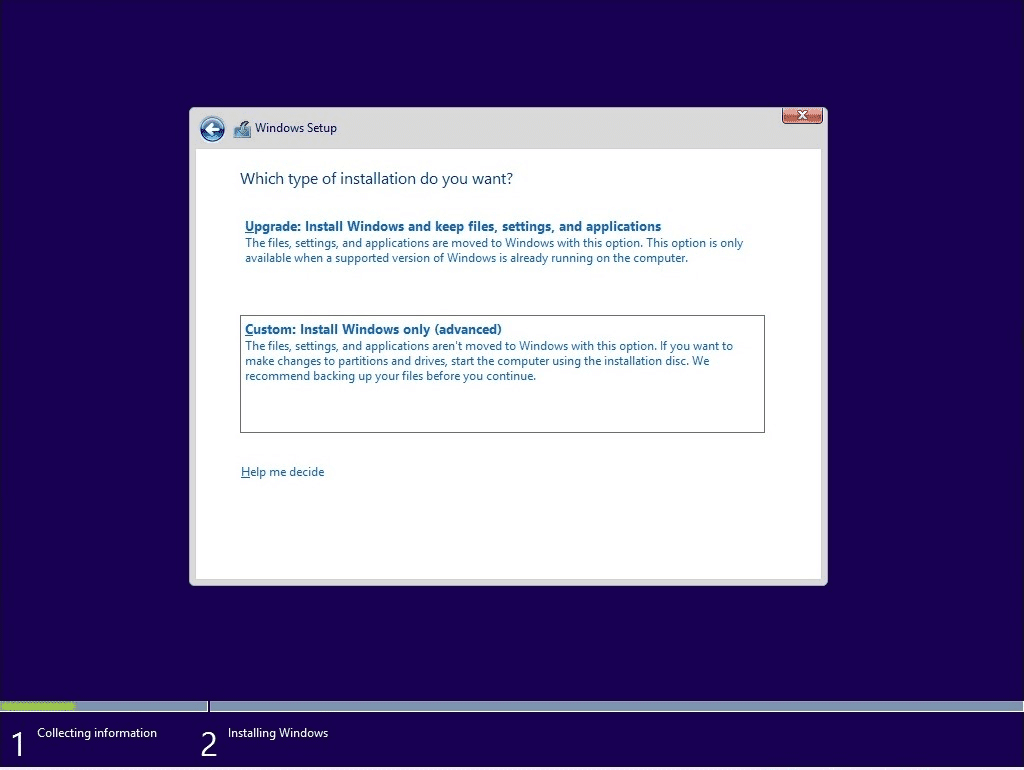
You will see two options, select the “Custom Installation”. Here you’ll see multiple drives on your PC. Except for the drive containing your data (should not be Local Disk C or your Primary drive), delete every partition. And then recreate partition by clicking on “Unallocated Space” and clicking on *New. It will show a message that – to make the system run perfectly, this setup will make additional partitions. This partition will be 500MB at max.
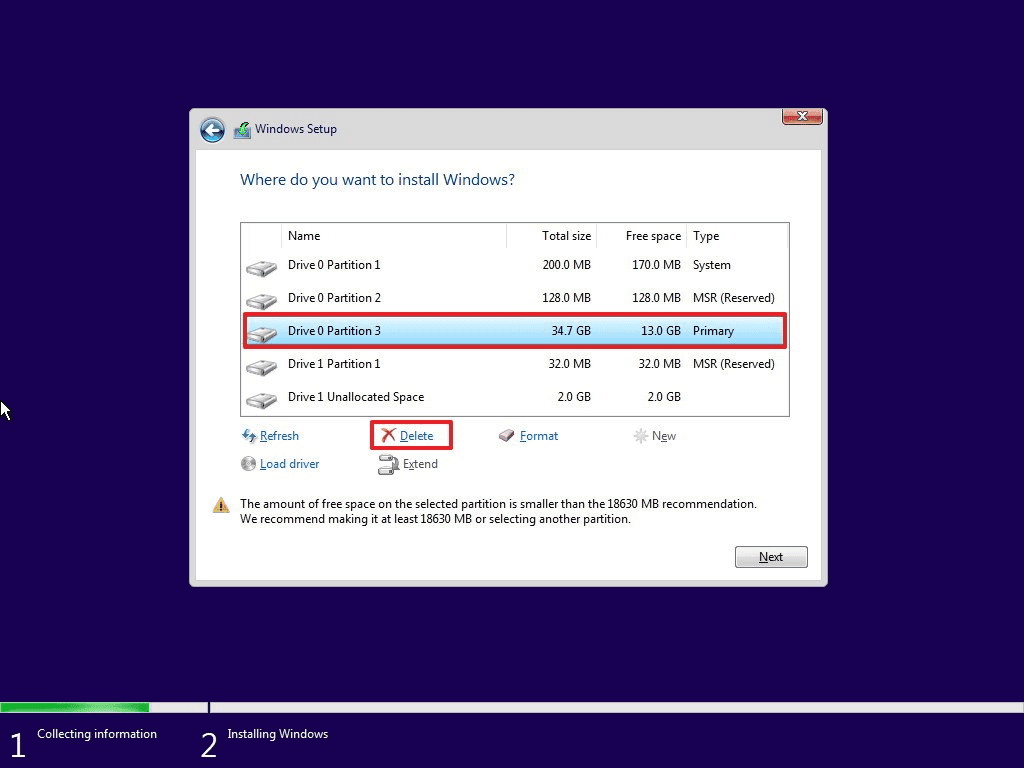
Now select your primary drive and click on next, now this will install the Windows to your PC. During the process it will restart a few times, so don’t be panic.
Here are all the links-
- Windows 11- click here.
- Rufus- click here.
Bong on! you have successfully installed Windows 11 on your PC. If you found it informative, you can share it with your friends. Also, join our community by subscribing to our Newsletter and YouTube Channel.
We’ll meet in the next blog. Until then,
Stay Safe! Stay Sarcastic!




GIPHY App Key not set. Please check settings